| |
|
|
|
 |
July13,2012 |
|
|
|
|
 |
 |
Courses offered:
We have empowered with faculties are having experience of more than 15 years . We also give 100% placement assistance to our students at the end of course /training completion based on their requirements.
ASNT level I & II ( RT, UT, MPT, VT , PT, ET, UT of TKY joints )
Advanced UT ( Practical Training )
Eddy current testing
Refresh courses for ASNT level III, AWS, CSWIP & API ) |

|
Liquid Penetrant Inspection
LPT is a Non-Destructive method for finding discontinuities that are open to the surface of solid and essentially non-porous materials.Indications of flaws can be found regardless of the size, configuration, internal structure or chemical composition of the workpiece being inspected and regardless of flaw orientation.
Liquid penetrants can seep into ( and be drewn into ) various types of minute surface openings ( reportedly as fine as 4 micro=inch in width ) by capillary action. Because of this, the process is well suited for the detection of all types of surface cracks, laps, porosity, shrinkage areas, laminations and similar discontinuities.
It is used extensively for the inspection of wrought and cast products of both ferrous and non-ferrous metals, powder metallurgy parts, ceramics, plastics and glass objects. |

|
Magnetic Particle Inspection
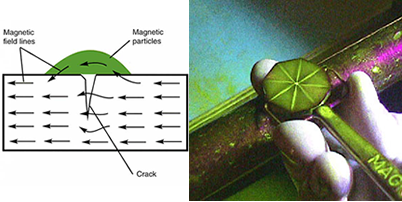
MPT is a method for locating surface and sub surface discontinuities in ferro magnetic materials. It depends for its operation on the fact that when the material or part under test is magnetized, magnetic discontinuities that lie in a direction of the magnetic field will cause a leakage field to be formed at and above the surface of the part.
The presence of this leakage field, and therefore the presence of the discontinuity is detected by the use of finally divided ferromagnetic particles applied over the surface, some of the particles being gathered and held by the leakage field. |

|
Eddy Current Inspection
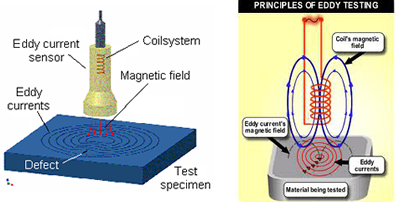
Eddy current Inspection is based on the principles of electromagnetic induction and is used to identify or differentiate between a wide variety of physical, structural and metallurgical conditions in electrically conductive ferromagnetic and non-ferro magnetic metals and metal parts.
Is an electromagnetic induction techniques. It does not require direct electrical contact with the part being inspected. The eddy current m,ethod is acceptable to high speed inspection and because it is non-destructive. It can be used to inspect an entire production output if desired. |

|
Radiographic Inspection
RT is a method used for Non-Destructive inspection of components and assemblies that is based on differential absorption of penetrating radiation either electromagnetic radiation of very short wavelength or particulate radiation by the part or test piece (object) being inspected. Because of differences in density and variations in thickness of the part or differences in absorption characteristics caused by variations in composition, different positions of a test piece absorb different amount of penetrating radiation.
Unabsorbed radiation passing through the part can be recorded on film or photosensitive paper, viewed on a fluorescent screen, or monitored by various types of electronic radiation detectors. The term radiography usually implies a radiographic process that produces a permanent image on film (Conventional radiography ) or paper ( Paper radiography or xeroxradiography ) although in a broadsense it refers to all forms of radiographic inspection. |

|
Radiographic Testing Film Interpretation
Paper indication of both the radiograph and the test piece, clarity of the penetrameter, suitability of radiographic techniques, adequacy of coverage and precision and uniformity of film processing all combine to produce a radiograph that is a representative image of the part being inspected.
A qualified interpreter must
-
Define the quality of the radiographic image which includes a critical analysis of the radiographic procedure and the image developing procedure.
-
Analyze the image to determine the nature and extent of any abnormal condition in the test piece.
-
Evaluate the test piece by comparing interpreted information with standards or specifications
-
Report inspection results accurately, clearly and within proper administrative channels
|

|
Ultrasonic Inspection
UT is a Non-Destructive method in which beams of high- frequency sound waves that are introduced into the material being inspected are used to detect surface and sub-surface flaw I.
The sound waves travel through the material with same attendant loss of energy ( at tenuation ) and are reflected at interfaces. The reflected beam is detected and analyzed to define the presence and location of flaws.
Most Ultrasonic inspection instruments detect by monitoring one or more of the following
-
Reflection of energy from metal-gas interfaces, metal liquid interfaces or discontinuities within the metal itself.
-
Time of transit of a sound wave through the test piece from the entrance point at the sending (transmitting) transducer to the exit point at the receiving transducer.
-
Attention of the beam of sound waves by absorption and scattering within the test piece.
|

|
Visual Inspection
VT is the monitoring of specific parameters by visual and optical assessments of test objects and surfaces using the visible position of the electromagnetic spectrum.
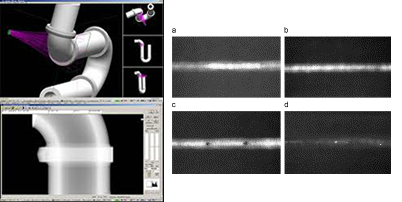
Inspection may be by the use of the eye alone or can be enhanced using optical systems such as magnifiers and microscopes. A variety of equipment is available to the visual inspector including mirrors and gauges which can be used for profile assessment borescopes and endoscopes, which are used on parts with limited access, and video and computer enhancement systems.
|

|
Leak Testing
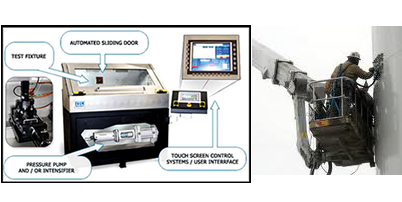
LT is the determination of the rate at which a liquid or gas will penetrate from inside a “tight” component or assembly to the outside, or vice versa as a result of a pressure differrntial between the two regions or of permeation of a somewhat extended barrier.
It has become conventional to use the term “ leak” to refer to an actual discontinuity or passage through which a fluid flows or permeates.
“Leakage” refers to the third that has flowed through a leak. “ Leak rate” refers to the rate of third flow per unit of time under a given set of conditions and is properly expressed in units of mass per unit of time.
The term “ minimum detectable leak “ refers to the smallest hole or discrete passage that can be detected and minimum detectable leak rate refers to the smallest detectable fluid flow rate. |
|
|
| |
|
|
|